|
A visitor to Only
Polly Pocket, Suzanne, asked her husband, Ron, to see if he could discover how to access
the battery in Polly's Wonderful Wedding Party. Bless his heart,
he did it! Many thanks go out to Suzanne and Ron for this effort! |
| |
|
| There are 10 screws to be removed and, as they are not
all the same size, it is recommended that you keep track of their
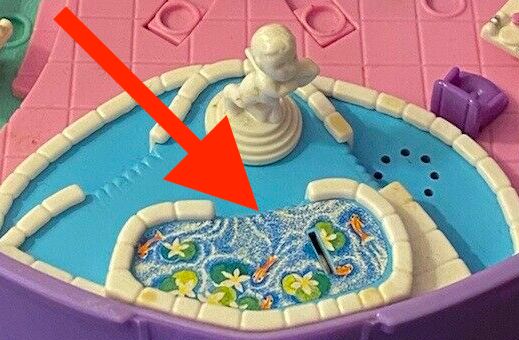
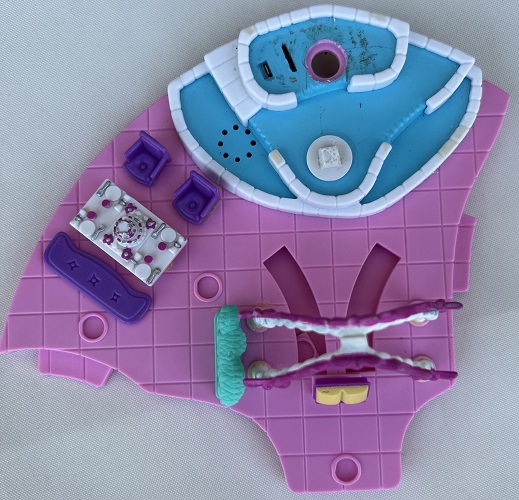
locations as you remove them Step 1: Remove the pond
sticker. This is the scary part and it is recommended that you
scan/photo the sticker prior to removing it so that if things go sideways, you
can print a new sticker. Ron said the sticker came away easily
but a hair dryer might help soften the glue. This was the hardest part.
Mine came off more or less in one piece but once it was replaced, you
can see some damage. |
| |
|
|
 |
| |
|
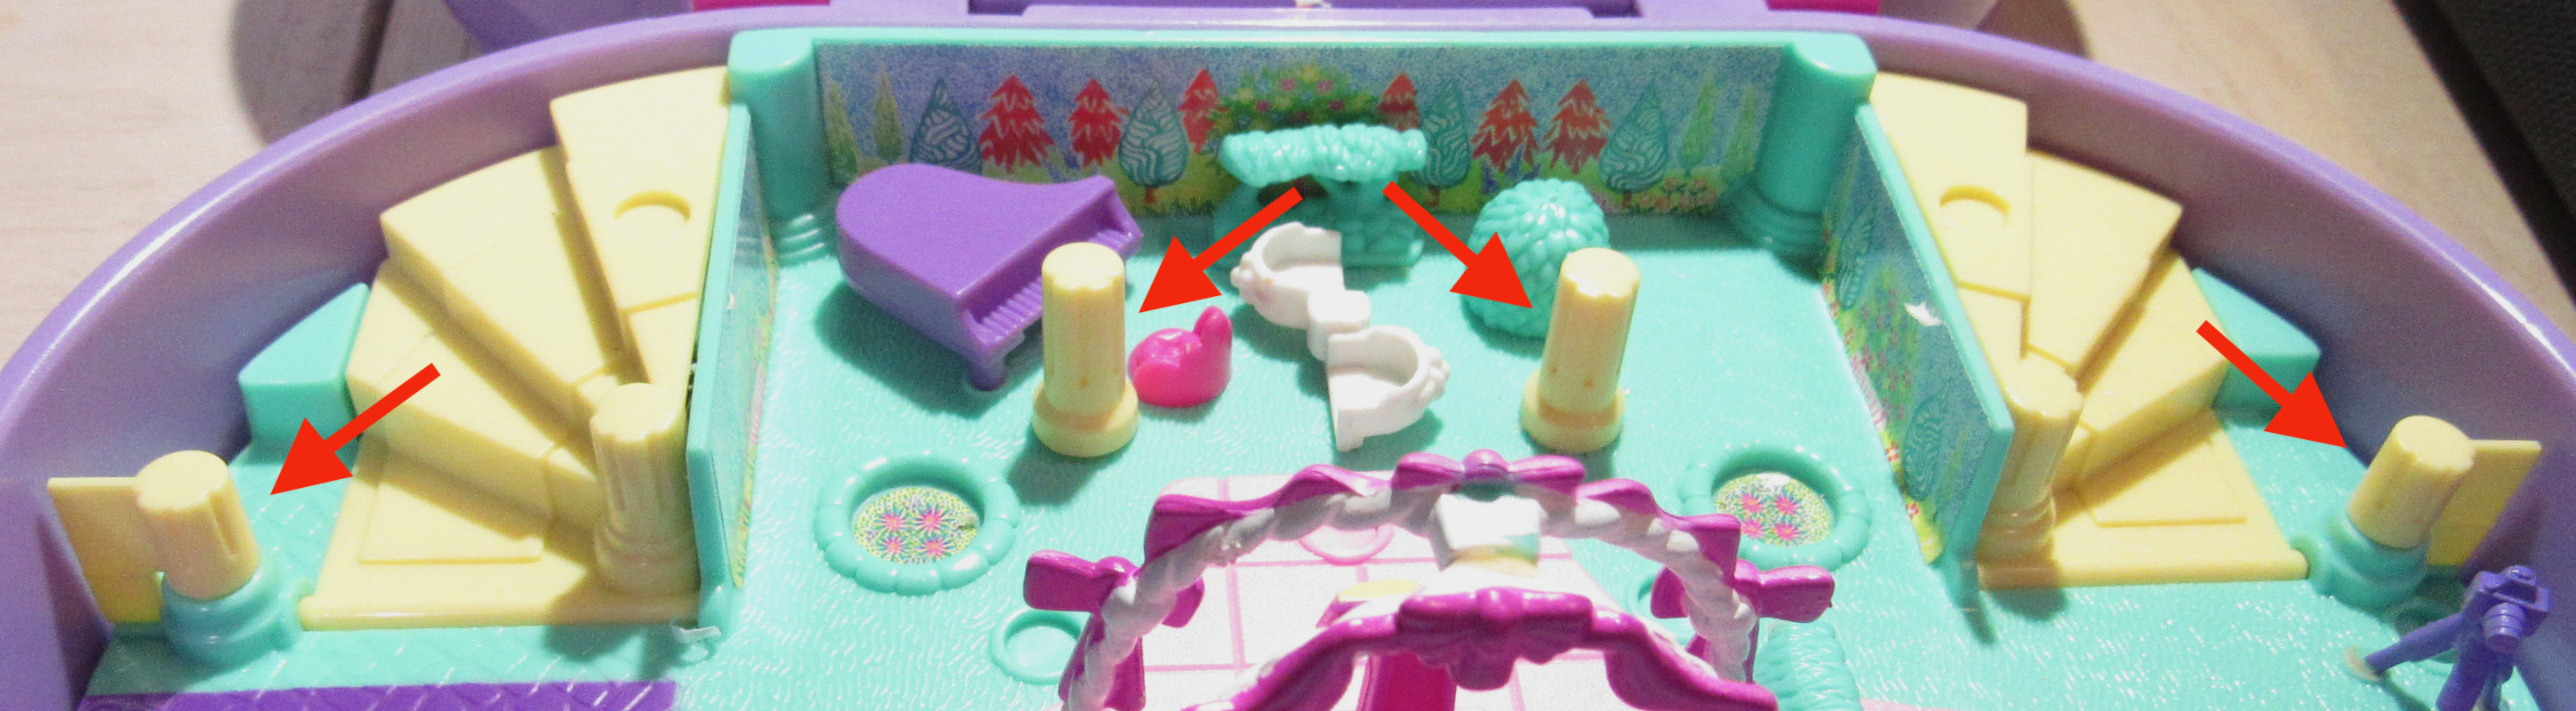
| Step 2: Remove the two yellow posts that
are next to the white garden seat and the two posts that are at the base
of the yellow stairs. Ron used a hair dyer to loosen the glue at
the base of these posts. I was able to remove these posts easily
by holding the base in needle-nose pliers and GENTLY rocking them back
and forth. |
| |
|
|
 |
| |
|
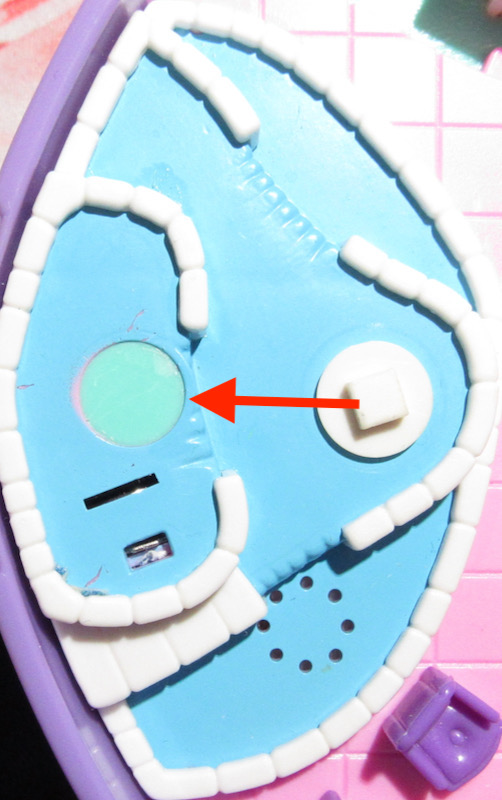
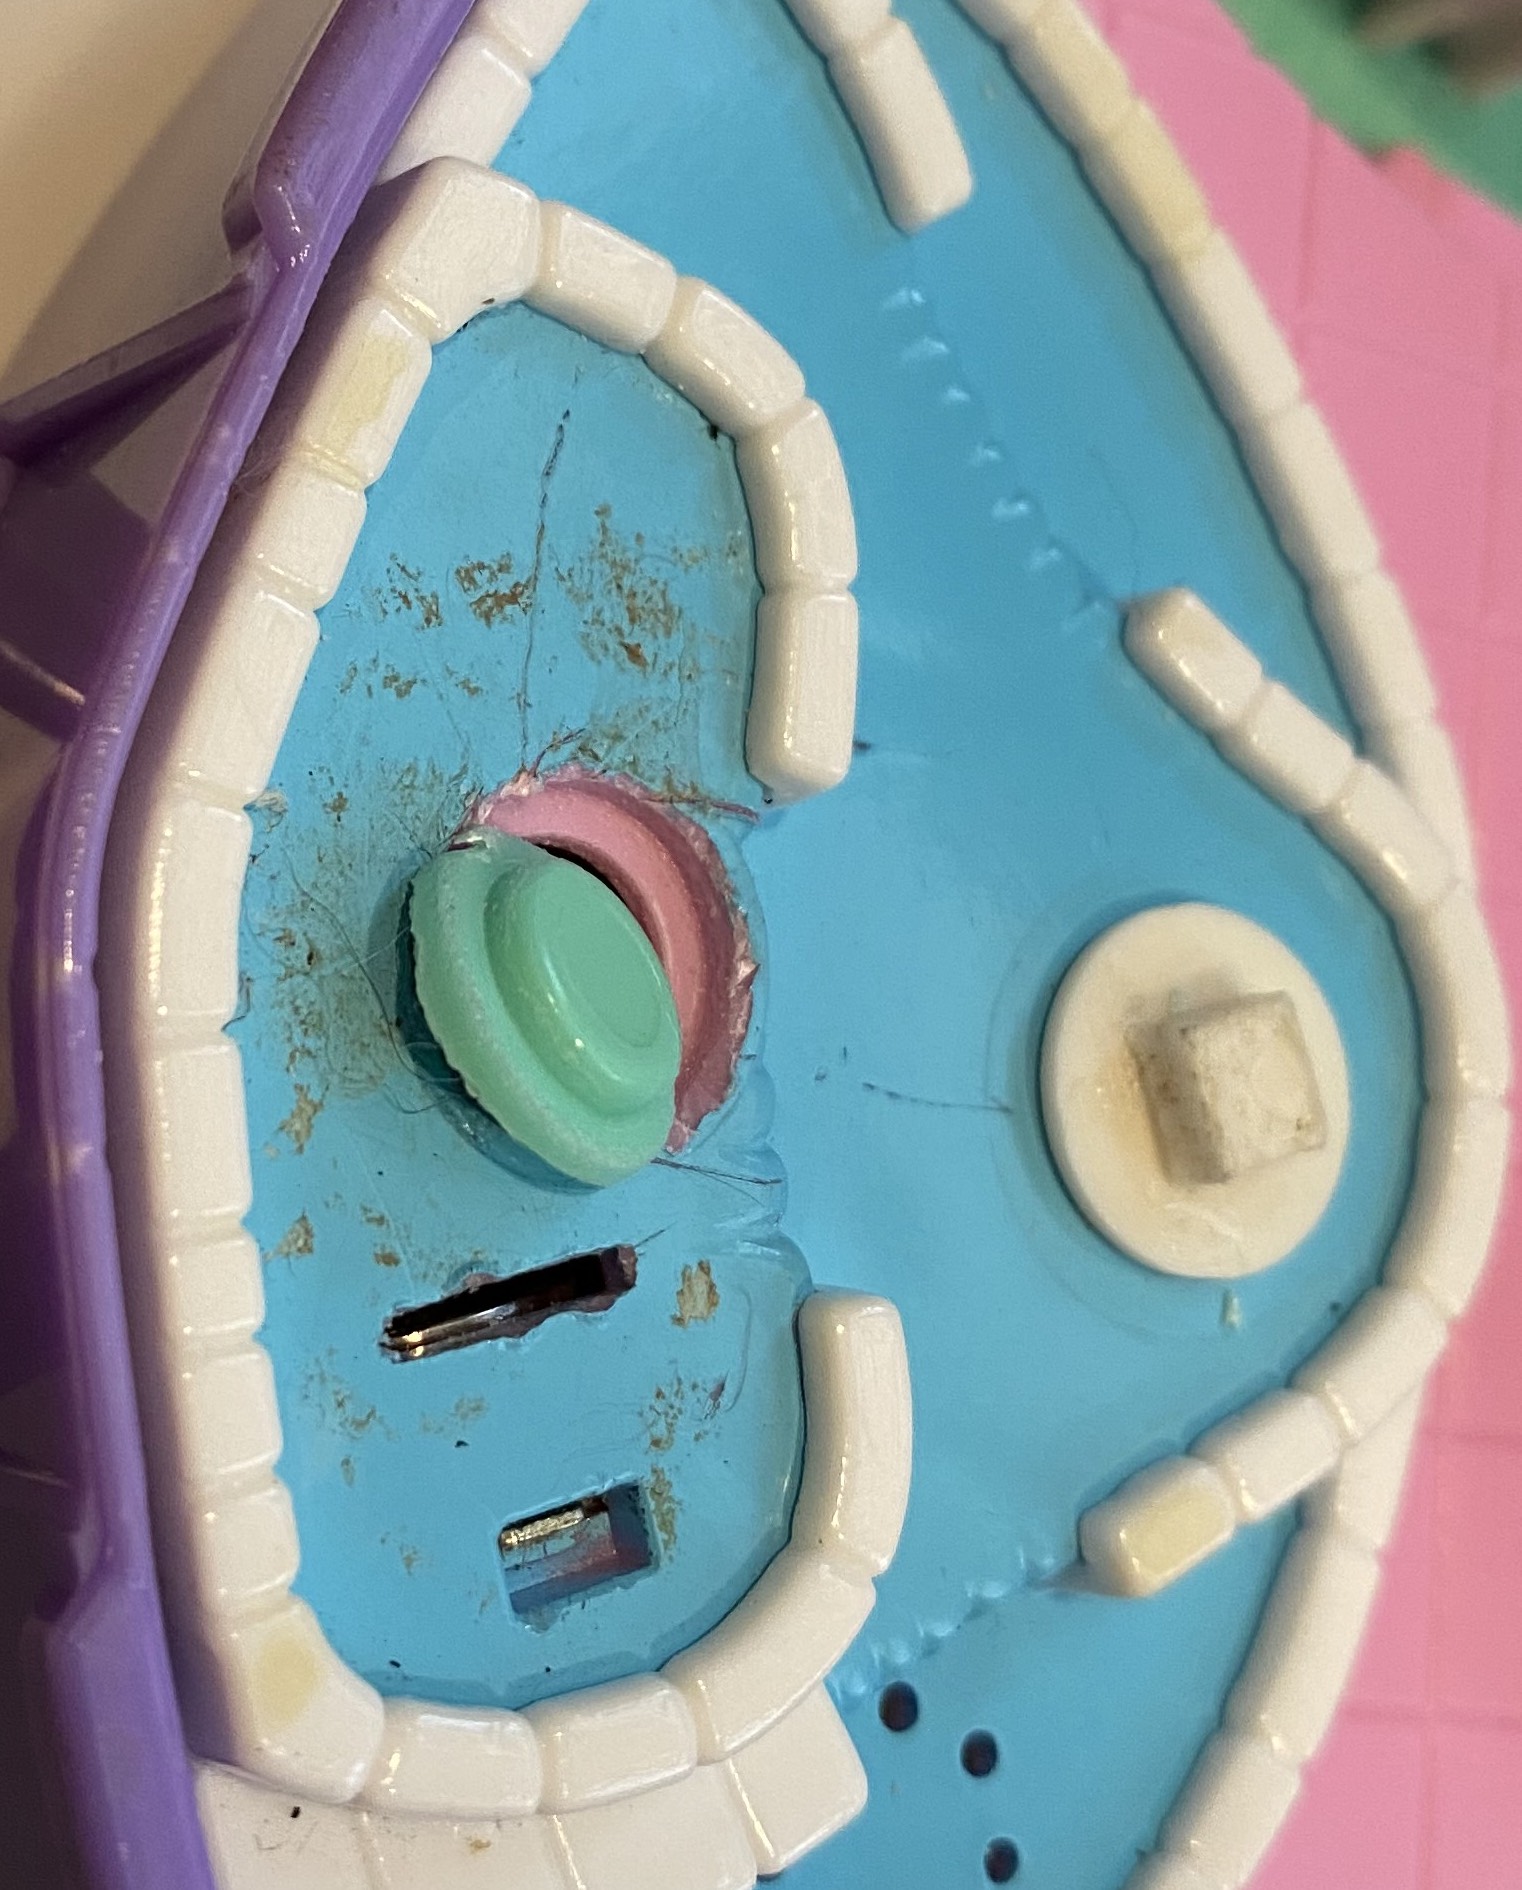
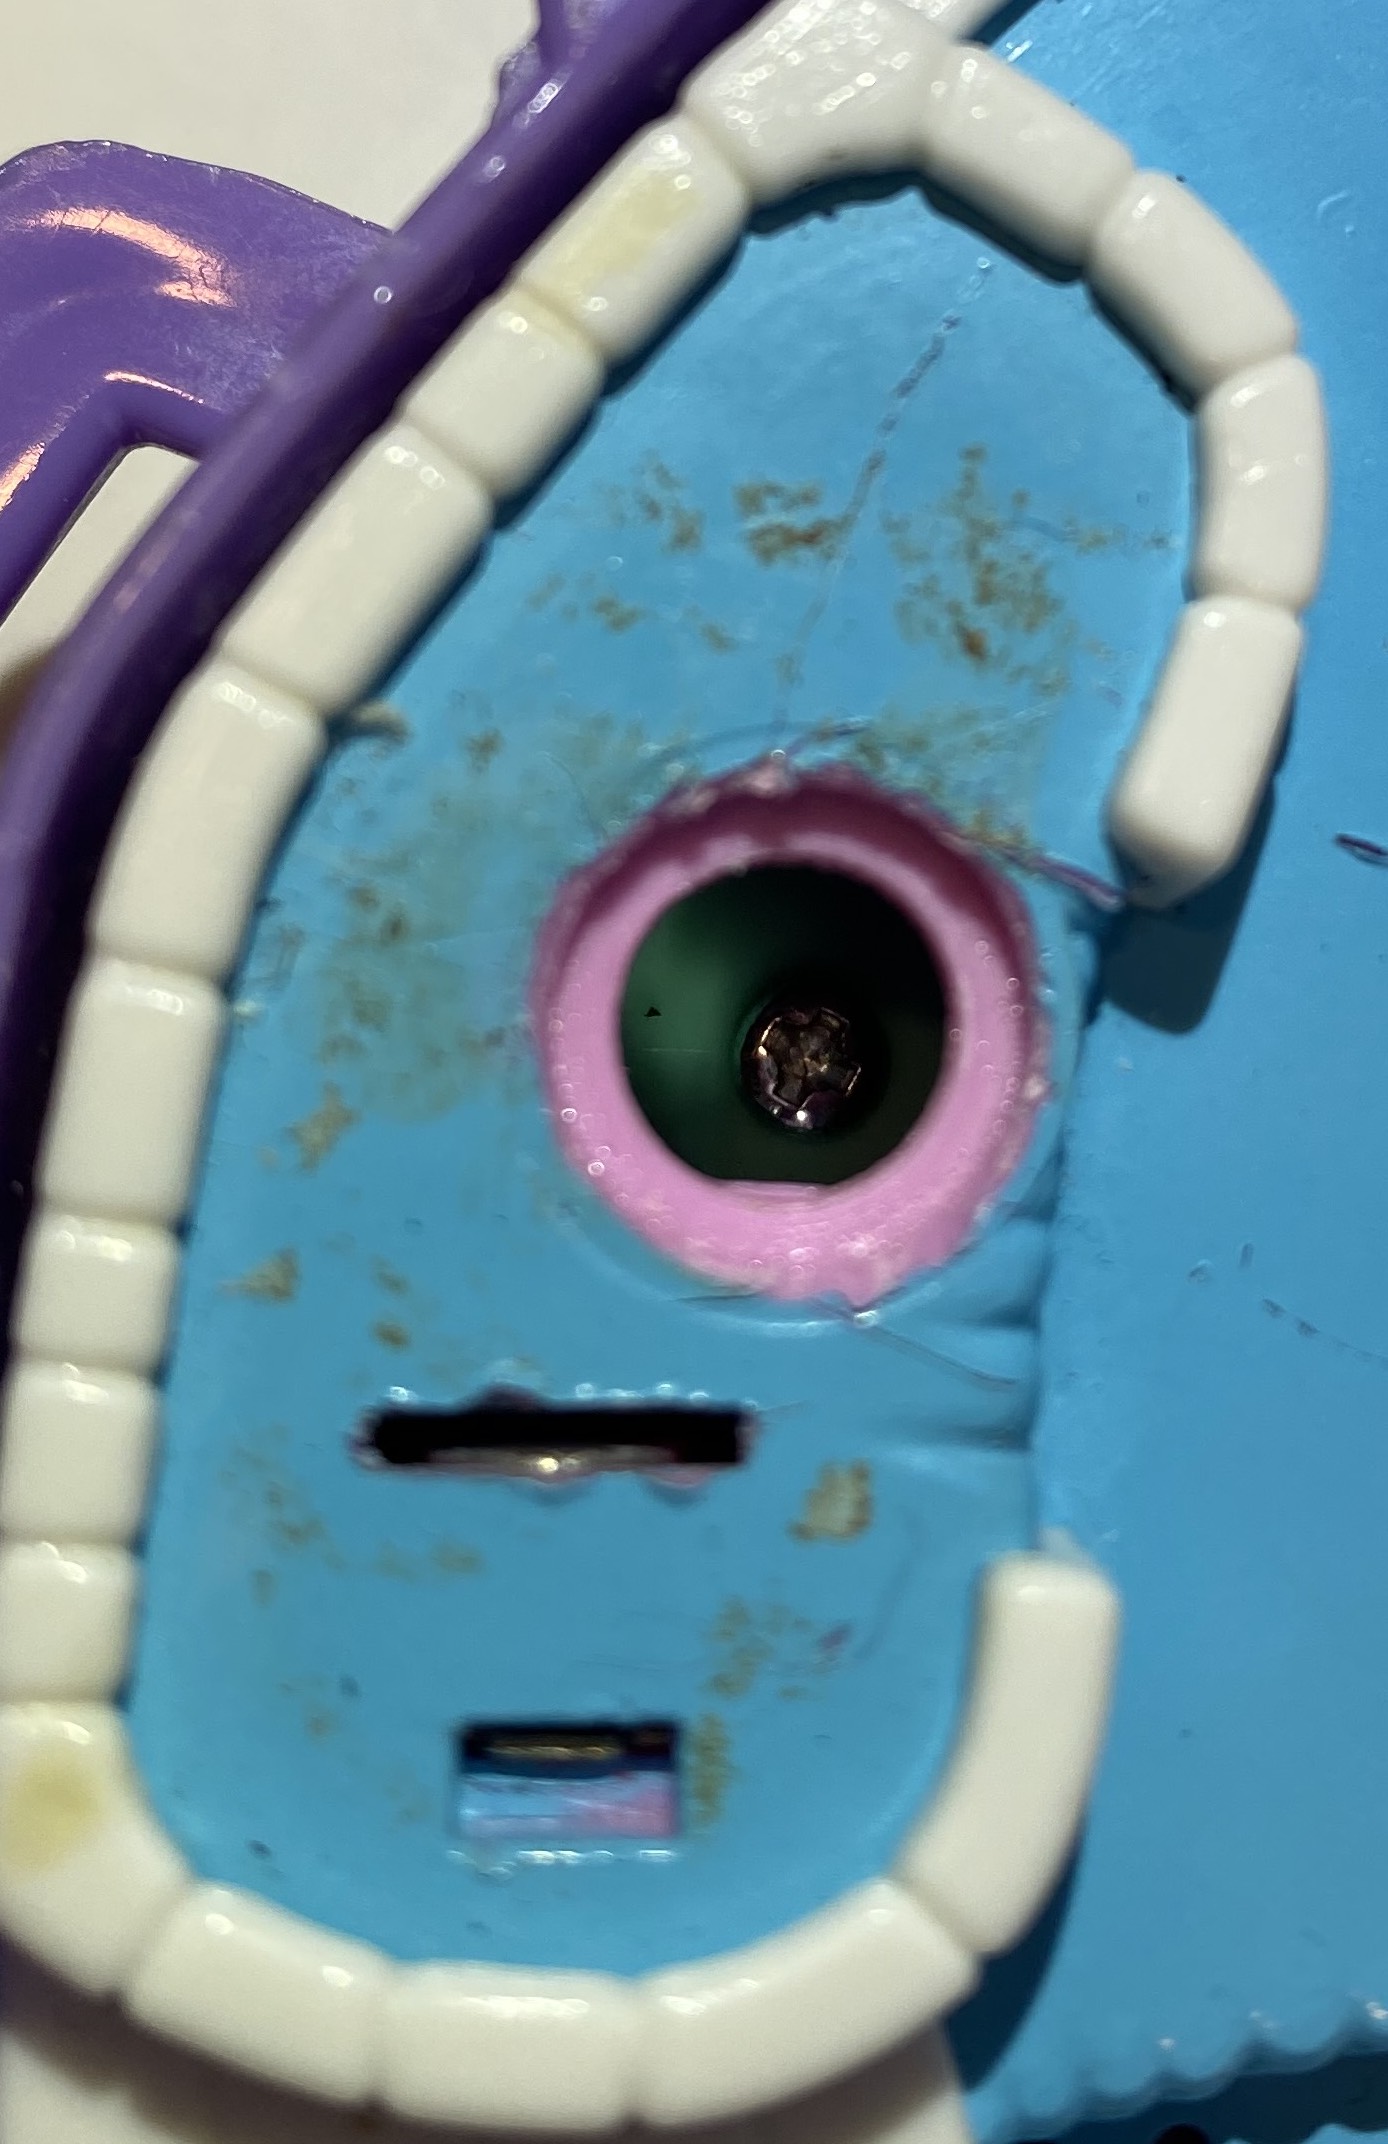
| Step 3: Again using a hairdryer to soften
the glue, remove the peg that is under the pond decal. The popped
out easily by using the tip of my box cutter blade. |
| |
|
|
|
| |
|
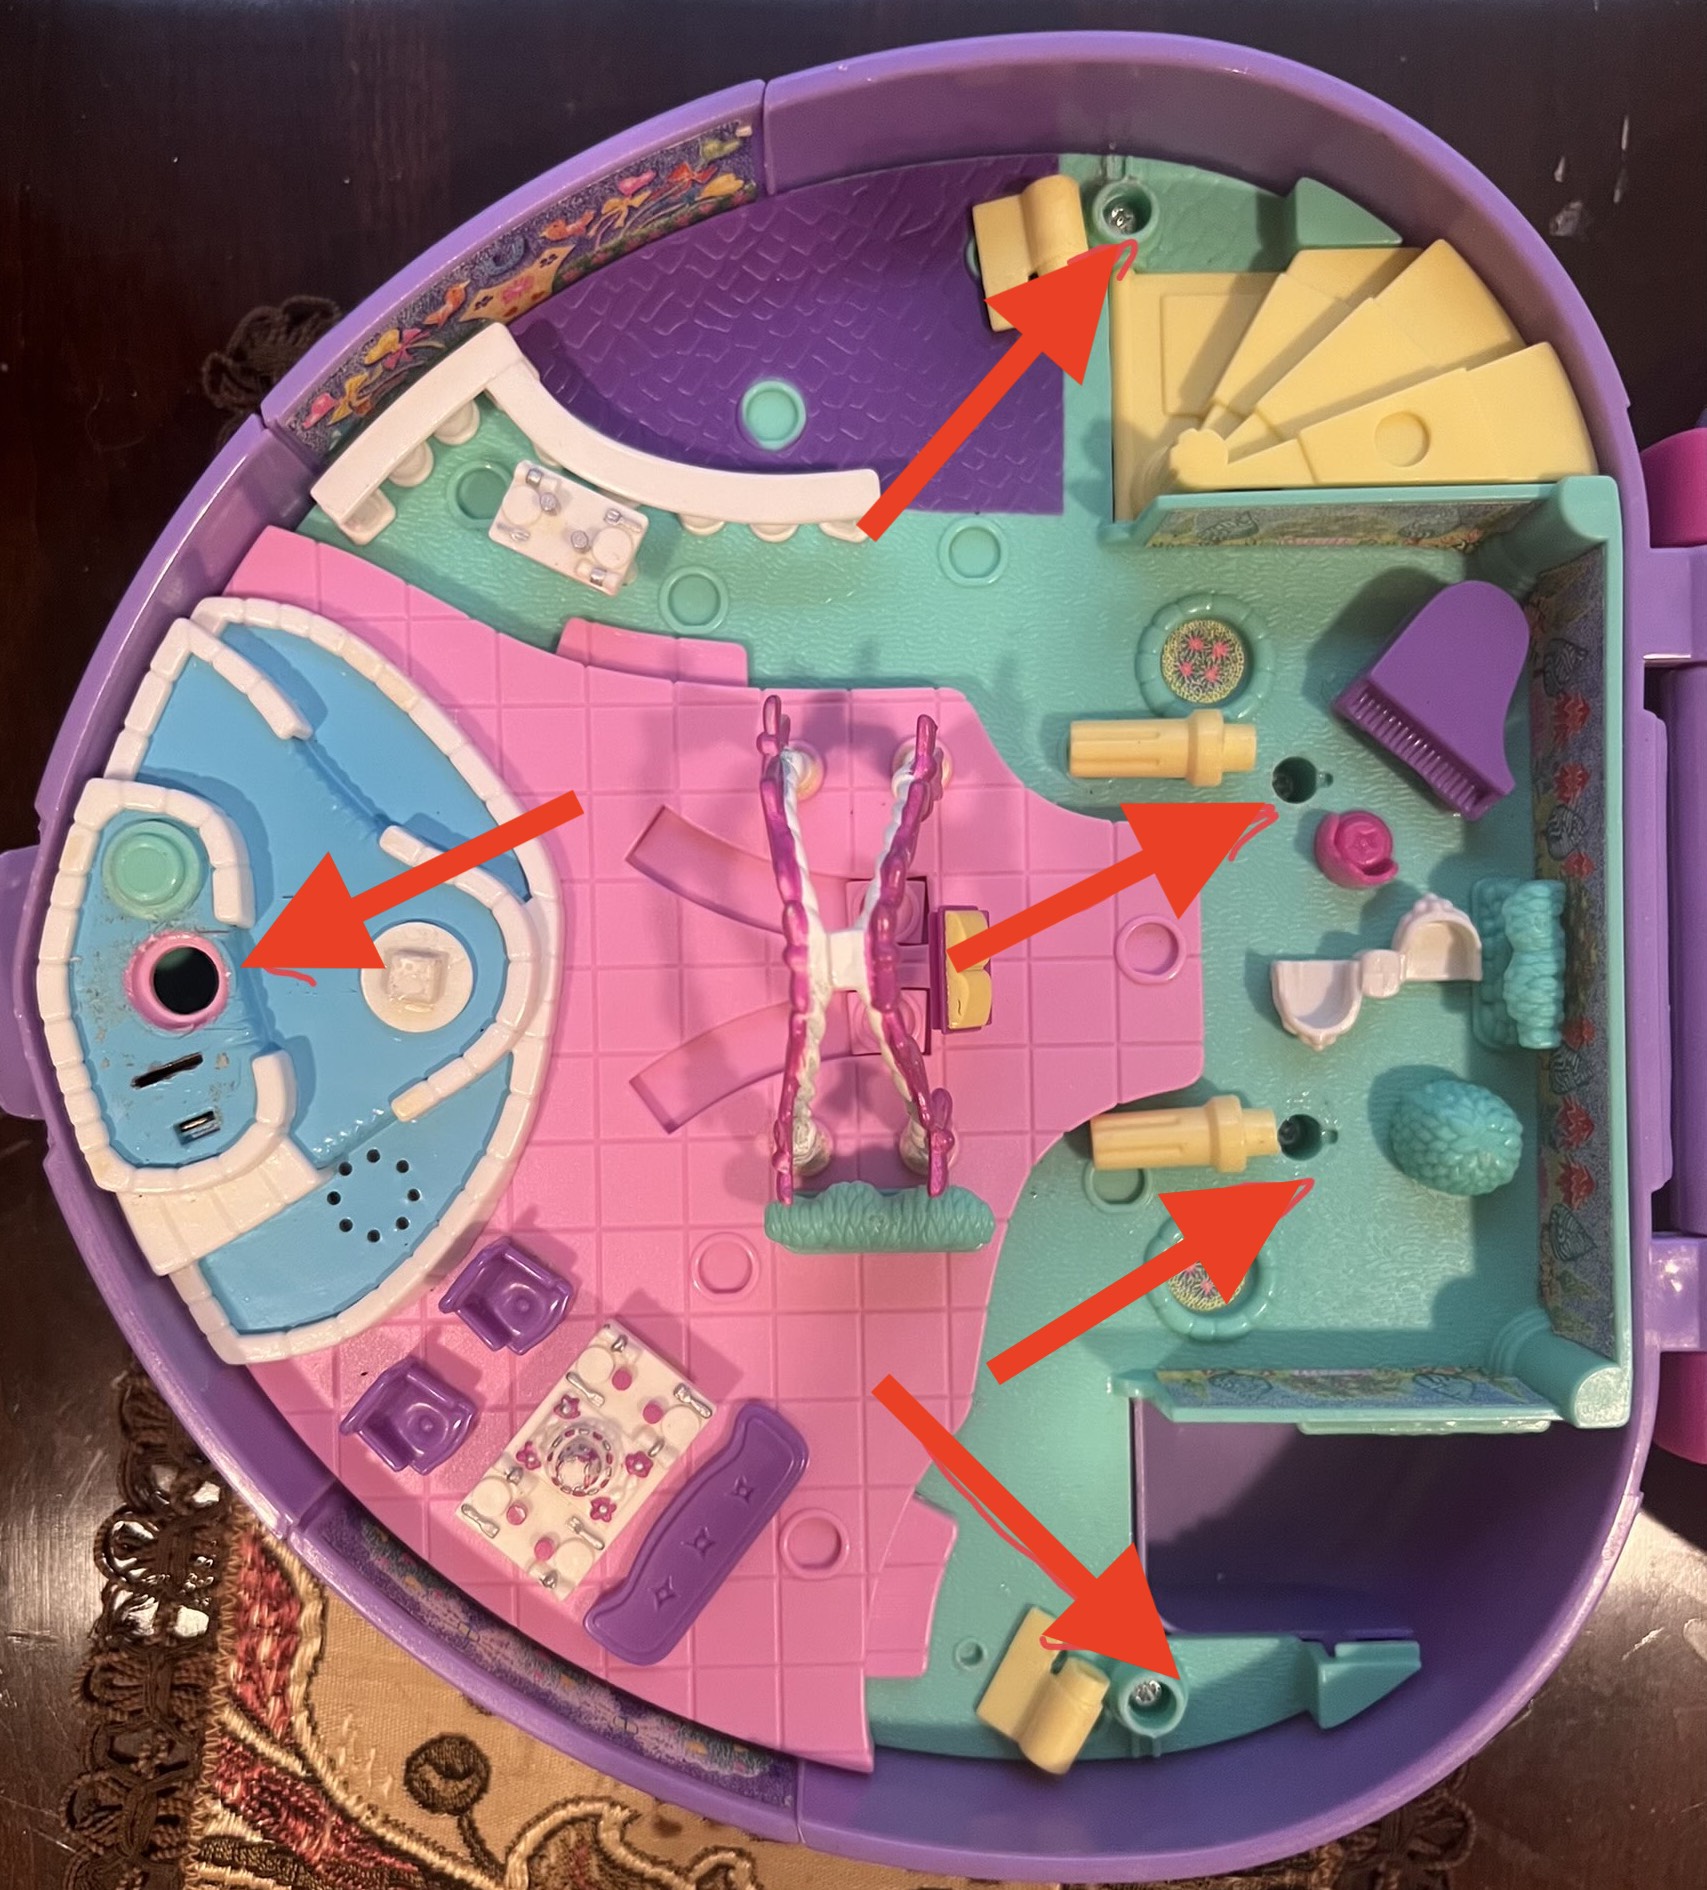
| Step 4: Remove five screws as shown below (Reminder:
note from which hole your remove the screws. The two screws under
the posts by the piano do not come all of the way out, they just loosen
enough to remove the panel in the following step. |
| |
|
|
 |
| |
|
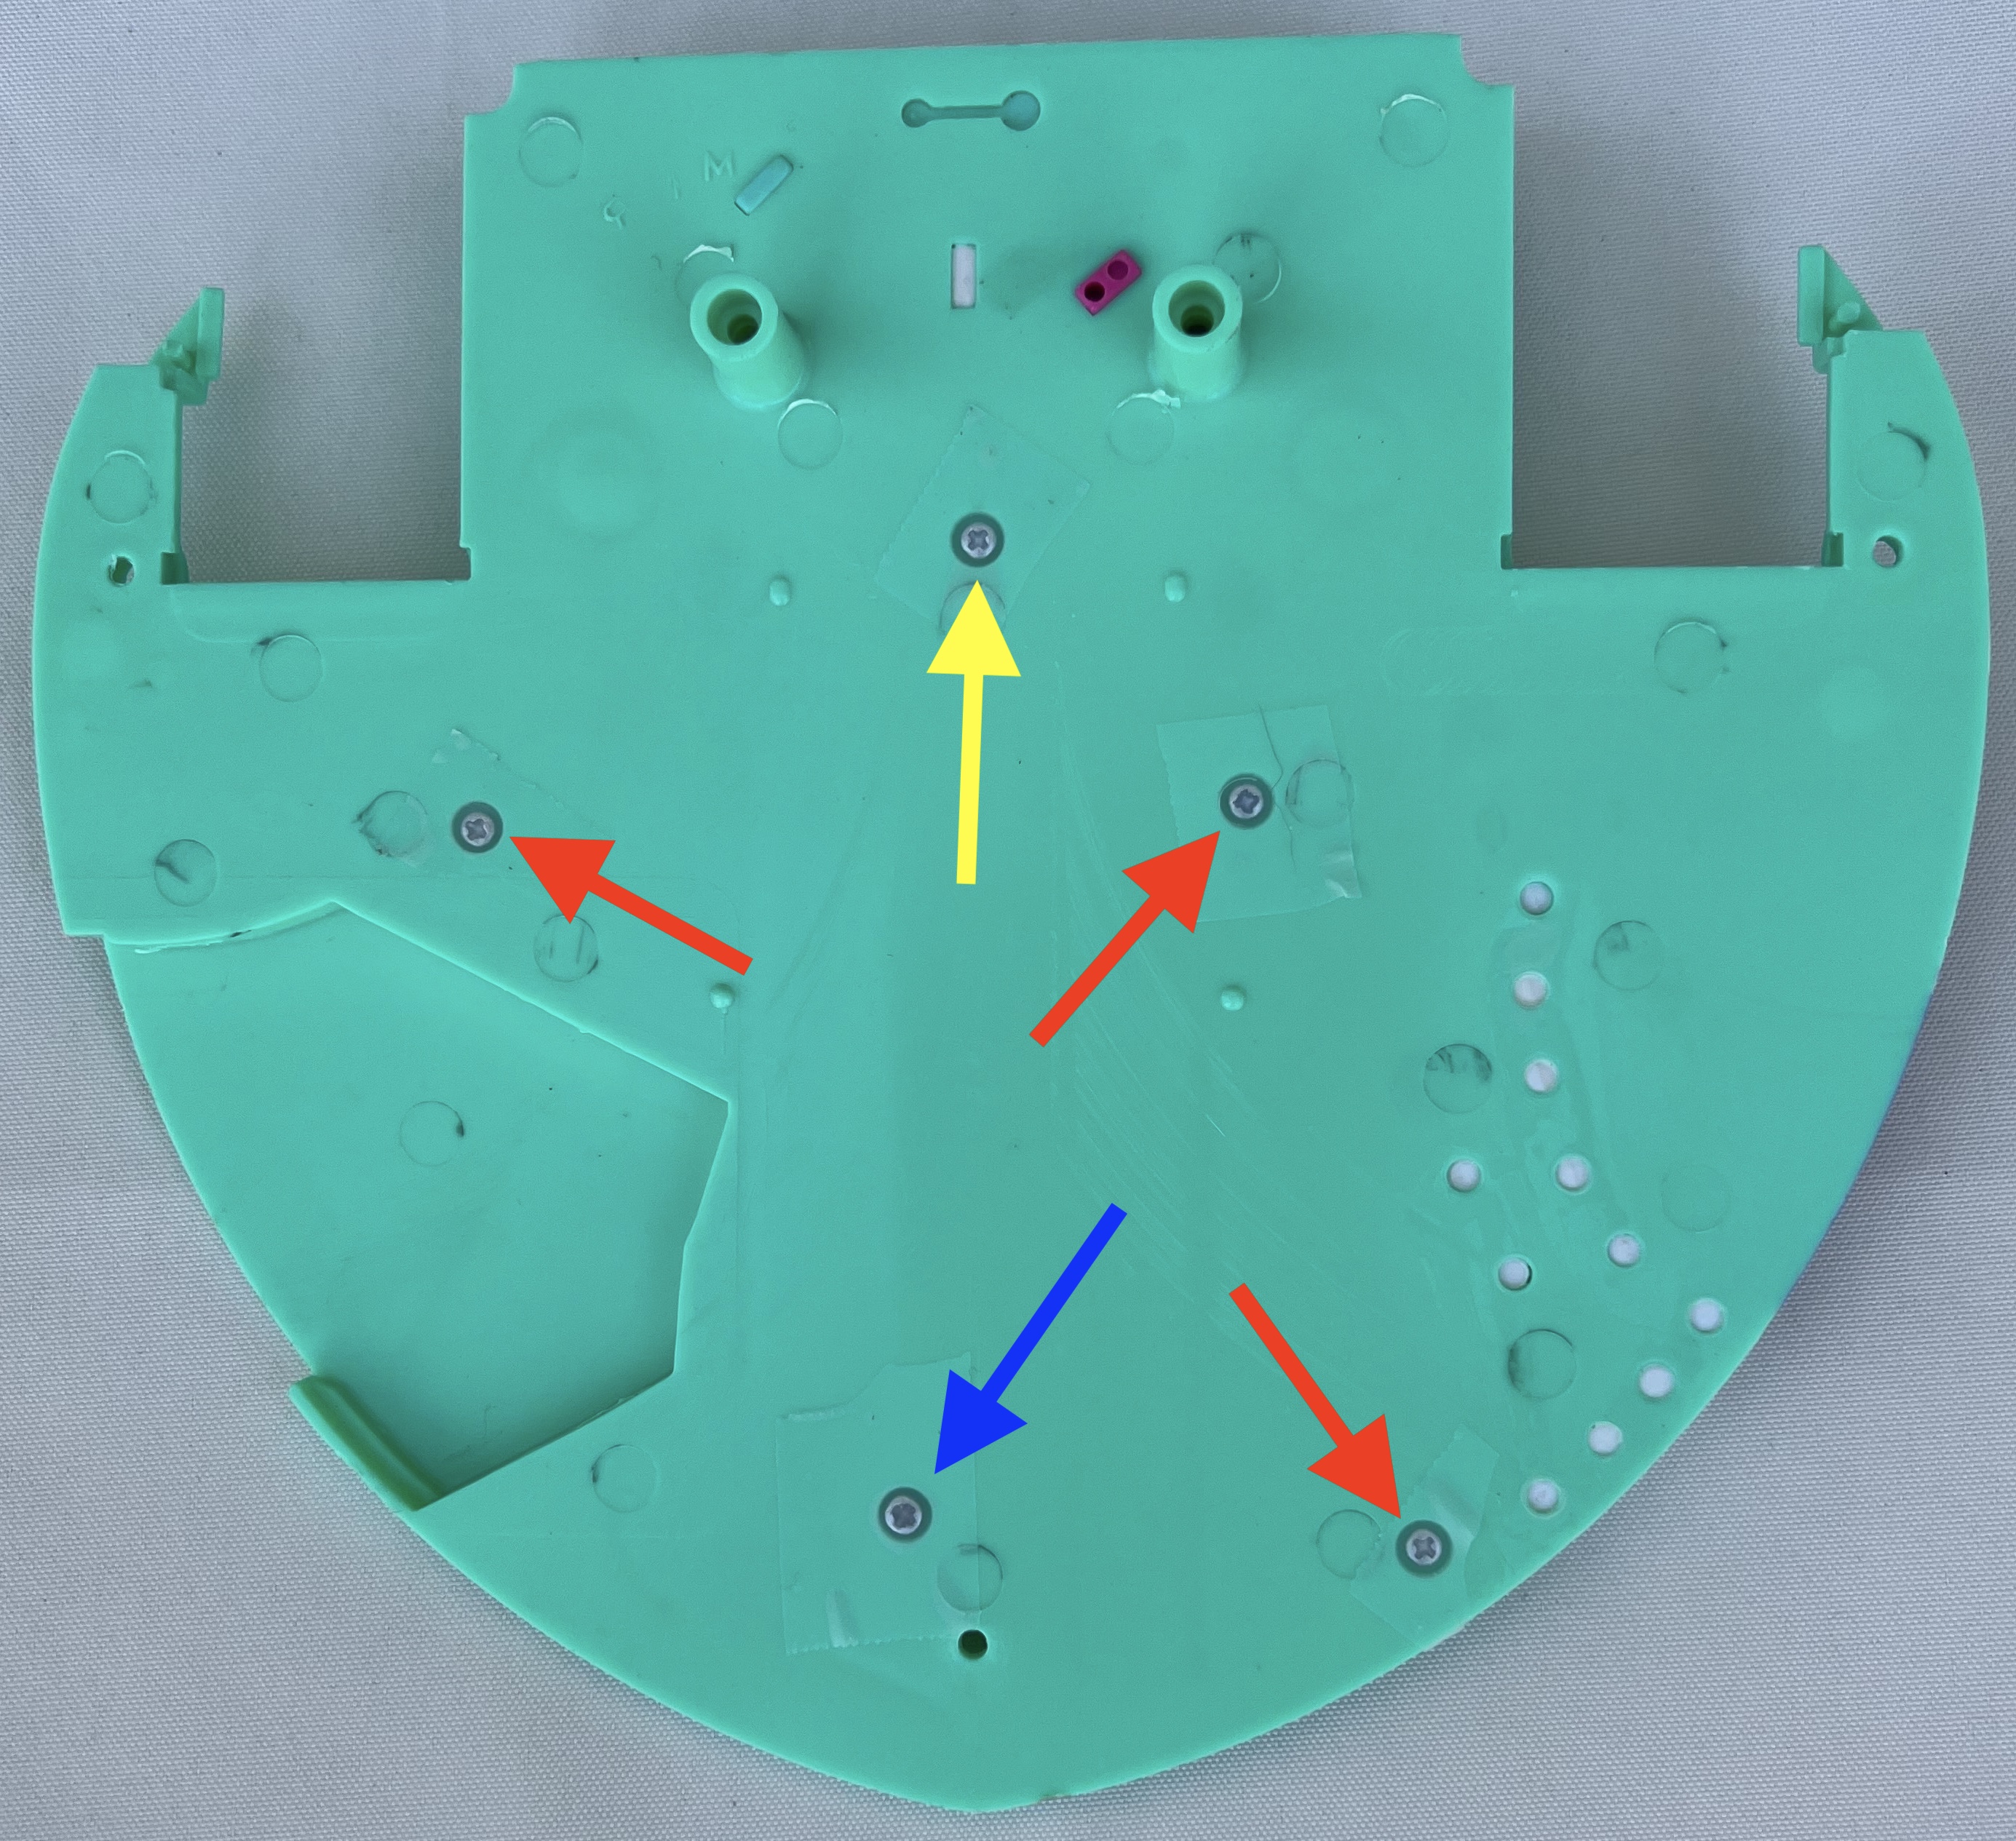
| Step 5: You can now lift out the insert.
Turn it over and remove the five remaining screws : The one
indicated by the yellow arrow is shorter than the ones indicated by the
red arrows and the one indicated by the blue arrow is longer than the
ones indicated by the red arrows. It is important to use the
correct screws when reassembling the set. |
| |
|
|
 |
| |
|
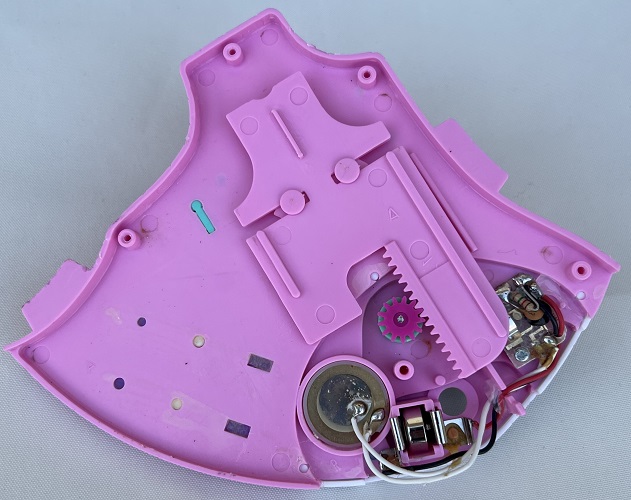
| Step 6: You can now detach the pink (pond)
section. Be careful here...the track piece may fall out and
getting it back on right is a little tedious. I taped it in place
while I was working on it and then carefully removed the tape before
reassembly. Turn it over to expose the wiring and battery location. |
| |
|
|
 |
| |
|
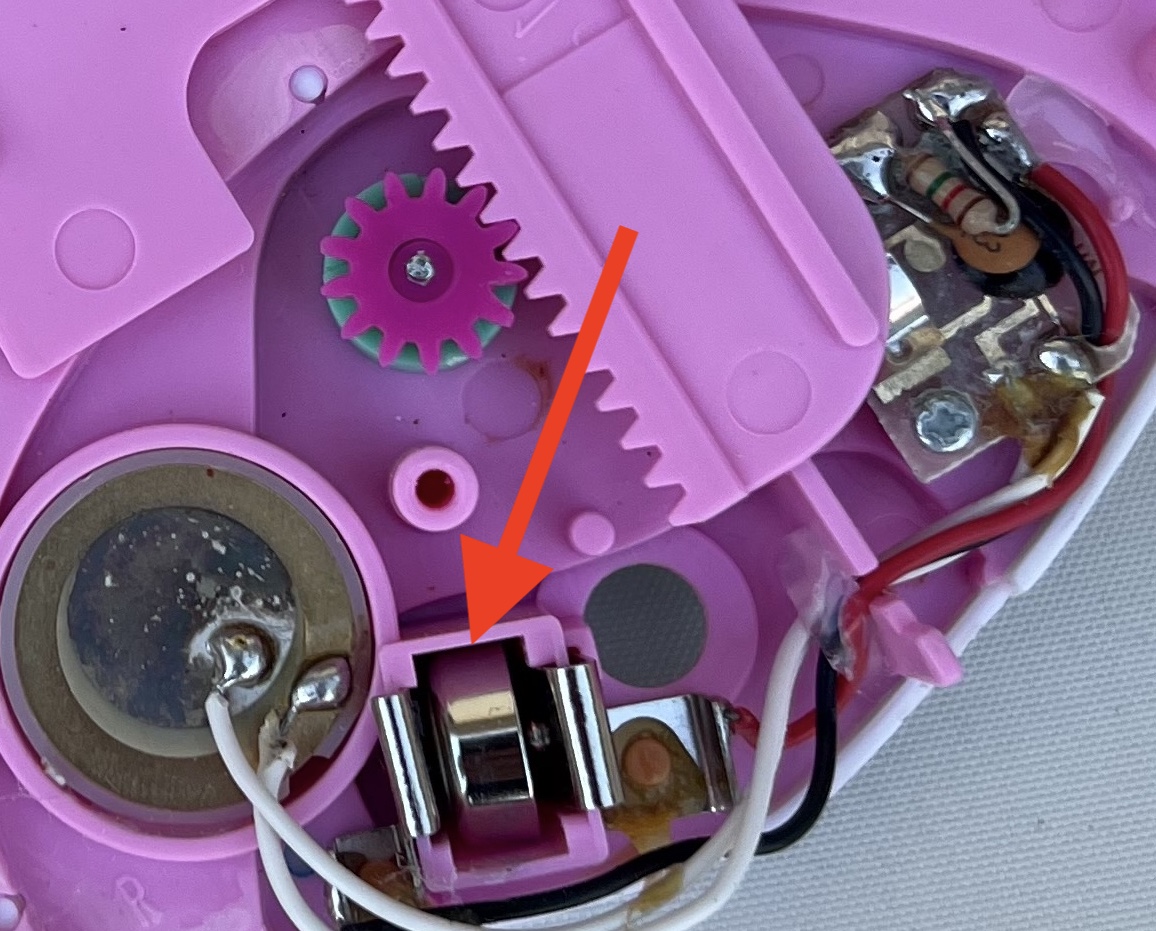
| Step 7: Replace the battery with
LR44/A76 battery and re-assembled your set. When you are
reassembling the set, you will need a magnetic Phillips screwdriver to
replace the screw under the pond. Mine kept falling through and I
finally just left it out...no harm, no foul. |
| |
|
|
 |